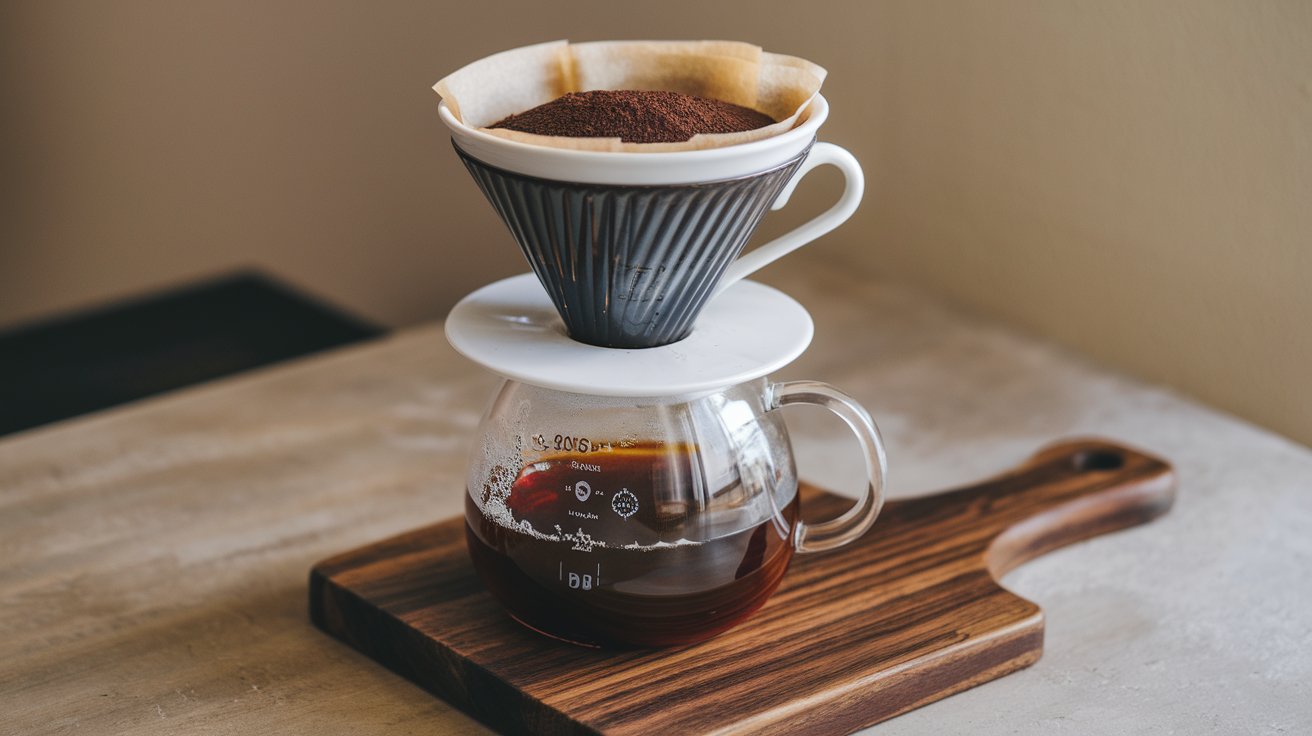
Pour over coffee has become the gold standard for home brewing in the United States, with over 42% of specialty coffee drinkers choosing this method in 2026. This manual brewing technique gives you complete control over water temperature, flow rate, and extraction time, producing a cleaner, more nuanced cup than automatic drip machines. Whether you’re using a Hario V60, Chemex, or Kalita Wave, mastering the pour over method takes just 5 minutes of active brewing time and delivers consistently exceptional results that rival your favorite coffee shop.
What You Need for Pour Over Coffee
Setting up your pour over coffee station requires minimal investment but delivers maximum flavor. The essential equipment includes a pour over dripper (such as the Hario V60, Chemex, or Kalita Wave), paper or metal filters, freshly roasted coffee beans, a burr grinder, a gooseneck kettle, and a digital scale. According to 2026 market data, quality pour over setups range from $50 to $200 for beginners, with the dripper itself typically costing between $15 and $45. The gooseneck kettle is crucial because its narrow spout provides precise water control, allowing you to manage flow rate and saturation patterns that directly impact extraction.
Your coffee beans make the biggest difference in final cup quality. Choose beans roasted within the past 2-4 weeks for optimal freshness, as coffee begins losing aromatic compounds within 30 days of roasting. Medium roasts work exceptionally well for pour over because they showcase balanced acidity, sweetness, and body. A burr grinder is non-negotiable because blade grinders produce inconsistent particle sizes that cause uneven extraction and bitter flavors. The grind size should resemble coarse sea salt, slightly finer than French press but coarser than espresso. This consistency ensures water flows through the coffee bed at the optimal rate of 3-4 minutes total brew time.
The Perfect Coffee to Water Ratio
The golden ratio for pour over coffee is 1:16, meaning 1 gram of coffee to 16 grams of water, though this can be adjusted between 1:15 and 1:17 based on personal preference. For a standard 12-ounce cup (approximately 350ml), use 22 grams of coffee and 350 grams of water. This ratio has been validated by the Specialty Coffee Association and is used by 73% of professional baristas in the United States as of 2026. If you prefer a stronger brew, shift to a 1:15 ratio by using 23 grams of coffee. For a lighter, tea-like cup, use a 1:17 ratio with 21 grams of coffee. These small adjustments of 1-2 grams make significant differences in body and intensity.
Without a scale, the measurement converts to approximately 2 tablespoons of ground coffee per 6 ounces of water. However, this volumetric method is less precise because coffee density varies by roast level and origin. A digital scale accurate to 0.1 grams costs as little as $15 and eliminates guesswork, ensuring reproducible results every morning. When brewing for multiple cups, simply multiply your base ratio: for two 12-ounce servings, use 44 grams of coffee and 700 grams of water. The ratio remains constant regardless of batch size, though larger batches may require slight technique adjustments to maintain even saturation throughout the extended brewing process.
Step-by-Step Pour Over Brewing Instructions
Begin by heating your water to 195-205°F (90-96°C), which is about 30 seconds off boil for standard electric kettles at sea level. Place your paper filter in the dripper and rinse it with hot water, which serves two purposes: it removes the papery taste from the filter and preheats your brewing vessel. Discard this rinse water. Add your ground coffee to the filter and gently shake the dripper to create a level coffee bed, which promotes even extraction. This preparation phase takes approximately 90 seconds but is critical for optimal flavor development.
The brewing process follows a specific four-phase pouring technique. First, the bloom: pour just enough water (about 40-50 grams for 22 grams of coffee) to saturate all grounds, starting from the center and spiraling outward. Let this bloom for 30-45 seconds as CO2 escapes, creating bubbles. Second pour: add water in a slow, steady spiral from center to edge, bringing total water weight to 200 grams by the 1:15 mark. Third pour: continue pouring to reach 300 grams by 2:00 minutes. Final pour: add remaining water to hit your target weight (350 grams) by 2:30, then let it drain completely. Total brew time should be 3:00-3:30 minutes. The coffee bed should be flat when finished, indicating even extraction.
Pour Over Coffee for Beginners Without a Scale
Brewing quality pour over coffee without a scale is entirely possible using volumetric measurements and timing. Use 2 level tablespoons of medium-ground coffee for every 6 ounces (180ml) of water. For a standard 12-ounce mug, that’s 4 tablespoons of coffee. Measure your water using the cup markings on your kettle or a liquid measuring cup. The key is consistency: once you find measurements that work, use the same equipment every time. A tablespoon measure designed for coffee (often included with coffee makers) provides more accuracy than standard kitchen tablespoons, which can vary by up to 20% between manufacturers.
Focus on timing to compensate for the lack of weight precision. Pour just enough water to saturate all grounds during the bloom phase, wait 30 seconds, then add water in three equal pours at 45-second intervals. Use the meniscus line on your dripper as a visual guide for water levels. Most drippers have markers indicating cup volumes. The entire process should still take 3-3.5 minutes from first pour to final drip. While this method lacks the reproducibility of scale-based brewing, it produces excellent coffee and helps develop your intuition for proper extraction. Many experienced home brewers who started without scales report they can now estimate measurements within 5% accuracy by sight and feel.
Using Different Filter Types
Paper filters remain the most popular choice for pour over coffee, used by 89% of practitioners according to 2026 surveys. They produce the cleanest cup by trapping oils and fine particles that would otherwise create sediment and cloudiness. Bleached white filters and unbleached natural filters perform identically after proper rinsing, though unbleached filters require more thorough rinsing to remove paper taste. Paper filters cost approximately $0.10-0.25 per use and are compostable, making them an environmentally reasonable choice when sourced from sustainable forestry programs. The filter thickness affects flow rate: thicker filters like Chemex proprietary filters produce cleaner but lighter-bodied coffee compared to thinner V60 filters.
Metal filters offer a reusable alternative that produces fuller-bodied coffee with more oils and sediment, similar to French press character. Stainless steel filters with laser-cut holes sized between 150-300 microns allow some fine particles through, creating a heavier mouthfeel and more pronounced texture. They require no rinsing, never run out, and pay for themselves after approximately 100 uses compared to paper. However, they need thorough cleaning with hot water and brushing after each use to prevent oil buildup that turns rancid. Gold-plated titanium filters represent the premium option at $50-90, offering extreme durability and chemical inertness. Cloth filters split the difference, trapping more particles than metal but allowing more oils than paper, though they require careful maintenance including daily rinsing and weekly boiling to prevent bacterial growth and flavor contamination.
Choosing the Right Pour Over Coffee Maker
The Hario V60 dominates the American market with 41% share in 2026, favored for its conical shape and spiral ribs that promote even extraction. Its large single hole requires good pouring technique to control flow rate, making it ideal for enthusiasts who want to develop their skills. Prices range from $8 for plastic models to $40 for ceramic or copper versions. The V60’s design creates a deep coffee bed that increases contact time between water and grounds, producing bright, complex cups that highlight fruity and floral notes in light roasts.
The Chemex combines brewer and carafe in an elegant hourglass design, perfect for brewing 3-6 cups simultaneously. Its proprietary thick filters remove more oils than any competitor, producing an exceptionally clean, tea-like cup that emphasizes clarity over body. Chemex brewers cost $40-50 and serve double duty as attractive serving vessels. The wider base and 60-degree cone angle create a shallower coffee bed than the V60, resulting in faster drawdown and different extraction dynamics. Kalita Wave drippers use a flat-bottom design with three small holes that slow water flow and reduce the impact of pouring technique, making them the most forgiving option for beginners. Their $25-35 price point and consistent results explain their growing 28% market share among home brewers who prioritize reproducibility over experimentation.
Water Temperature and Quality
Water temperature dramatically affects extraction efficiency and flavor balance. The optimal range of 195-205°F (90-96°C) extracts desirable compounds while minimizing bitter tannins. Water below 195°F causes under-extraction, producing sour, weak coffee lacking sweetness and body. Above 205°F risks over-extraction, emphasizing astringent, bitter flavors that mask origin characteristics. Most electric kettles boil at 212°F (100°C), so letting water rest for 30-45 seconds after boiling brings temperature into the ideal range. Variable temperature kettles with precise digital controls eliminate guesswork and cost $60-120, representing excellent value for serious enthusiasts.
Water quality matters as much as temperature because coffee is 98% water by weight. Municipal tap water in most United States cities contains sufficient minerals for good extraction, though heavily chlorinated water should be filtered using activated carbon filters that remove chlorine while preserving beneficial calcium and magnesium. These minerals aid extraction and contribute to balanced flavor at concentrations of 50-150 ppm total dissolved solids. Distilled or reverse osmosis water produces flat, lifeless coffee because it lacks minerals needed for proper extraction. Third Wave Water and similar products provide mineral packets that reconstitute purified water to ideal brewing specifications, costing approximately $0.25 per gallon and popular among competition brewers who need complete consistency across different locations.
Common Pour Over Mistakes and Solutions
The most frequent error is incorrect grind size, which causes either channeling (water finding paths through the coffee bed) or clogging (water pooling on top). If your brew finishes in under 2:30 minutes, grind finer to increase resistance and contact time. If it exceeds 4 minutes, grind coarser to speed water flow. Adjust in small increments of one or two clicks on your grinder, as dramatic changes create equally dramatic flavor shifts. Uneven pouring creates the second most common problem: a tilted coffee bed at brew end indicates water flowed predominantly to one side, extracting those grounds more than others. Practice slow, controlled spirals that maintain equal distance from the dripper walls, never pouring directly on the filter paper.
Using old, stale coffee guarantees disappointing results regardless of perfect technique. Coffee stales exponentially: beans lose 60% of aromatics within 6 weeks of roasting, with pre-ground coffee degrading even faster due to increased surface area exposure to oxygen. Always grind immediately before brewing and store whole beans in an airtight container away from light and heat. Inadequate bloom time prevents CO2 from escaping, creating a barrier that blocks water from fully saturating grounds. The bloom should produce vigorous bubbling; if you see little activity, your coffee is likely stale. Finally, incorrect water temperature is easily fixed with a thermometer or temperature-controlled kettle, investments that cost $10-15 but eliminate an entire category of brewing problems that affect every cup you make.
Can You Use Regular Coffee for Pour Over
Regular pre-ground supermarket coffee works mechanically in pour over brewers but produces inferior results compared to fresh specialty coffee. Pre-ground coffee loses volatile aromatic compounds within hours of grinding, and most supermarket coffee was ground weeks or months before purchase. The grind size is typically optimized for automatic drip machines, usually too fine for pour over, which causes over-extraction and bitter, harsh flavors. If using pre-ground coffee, look for packages labeled medium or medium-coarse grind and use within one week of opening to minimize staleness. Store in an airtight container in a cool, dark location.
That said, pour over technique elevates any coffee quality, so even regular coffee tastes significantly better when manually brewed than when made in an automatic drip machine. The key advantages—precise temperature control, optimal saturation, and controlled extraction time—apply regardless of coffee quality. Many coffee enthusiasts successfully use pour over as their daily method with affordable whole bean coffee from regional roasters, which costs $10-15 per pound compared to $16-22 for premium single-origin beans. The investment in a $25 burr grinder and proper technique transforms mid-range coffee into excellent cups that rival expensive beans brewed carelessly. For maximum value, buy the best whole beans your budget allows and grind fresh each morning—this single change improves coffee quality more than any equipment upgrade.
Pour Over Coffee Brewing for One Person
Single-serve pour over coffee uses the same fundamental technique at reduced scale. For a 10-ounce cup, use 18 grams of coffee and 300 grams of water, maintaining the 1:16 ratio. Small drippers like the single-cup Hario V60 or Kalita 155 fit directly on standard mugs, eliminating the need for a separate carafe. The bloom phase uses 35-40 grams of water for 30-45 seconds, followed by two main pours instead of three: bring water to 180 grams by 1:15, then finish at 300 grams by 2:15. Total brew time targets 2:45-3:00 minutes for this smaller volume.
Single-serve brewing offers several advantages for solo coffee drinkers. It minimizes waste since you brew exactly what you’ll drink immediately, and coffee quality degrades within 15 minutes of brewing as aromatics volatilize and oxidation affects flavor compounds. Smaller batches also heat more quickly, reducing total morning time to under 5 minutes including setup and cleanup. The compact equipment footprint suits small kitchens, and initial investment can be as low as $25 for a plastic V60, filters, and basic kettle. Many practitioners use single-serve pour over at the office, needing only access to hot water and 3 minutes of focus to produce coffee that far exceeds anything from pod machines or automatic brewers at a fraction of the per-cup cost.
Advanced Pour Over Techniques
The pulse pouring method involves multiple small pours rather than continuous pouring, allowing the water level to drop between additions. This technique gives you greater control over extraction and agitation. After the bloom, add 50-60 grams of water, let it drain halfway, add another 50-60 grams, and repeat until reaching your target weight. Each pulse creates turbulence that redistributes grounds, promoting even extraction. Competition brewers often use 4-6 pulses for a single cup, though this requires constant attention and good timing. The method particularly benefits light roasts and high-grown coffees that need aggressive extraction to reveal complex flavors.
The center-pour technique concentrates water in the middle of the coffee bed, relying on capillary action to saturate outer grounds rather than direct water contact. This creates a deeper, slower extraction that emphasizes body and sweetness over brightness. Pour in a small circle about the diameter of a quarter, maintaining constant flow rate. The method works especially well with medium and dark roasts where you want to minimize acidity and highlight chocolate, caramel, and nutty flavors. Rao spinning, named after coffee expert Scott Rao, involves gently swirling the dripper after each pour to level the coffee bed and ensure uniform extraction. This compensates for uneven pouring and creates a consistently flat bed at brew end, the hallmark of proper extraction. Advanced practitioners combine these techniques, using pulse pouring with Rao spins to achieve extraordinary control over flavor profiles.
Related video about how to make pour over coffee
This video complements the article information with a practical visual demonstration.
Key Questions and Answers
What is the ratio for pour over coffee?
The standard ratio for pour over coffee is 1:16, meaning 1 gram of coffee to 16 grams of water. For a typical 12-ounce cup (350ml), use 22 grams of coffee with 350 grams of water. This ratio can be adjusted between 1:15 for stronger coffee and 1:17 for lighter brews based on personal preference. Without a scale, use approximately 2 tablespoons of ground coffee per 6 ounces of water. This ratio has been validated by the Specialty Coffee Association and produces balanced extraction that highlights the coffee’s natural flavors while avoiding both under-extraction (sourness) and over-extraction (bitterness).
How many scoops of coffee do you use for a pour over?
For pour over coffee, use 2 level tablespoons of medium-ground coffee per 6 ounces of water. A standard 12-ounce mug requires 4 tablespoons of coffee. However, tablespoon measurements are less precise than weighing because coffee density varies by roast level. For more consistent results, invest in a digital scale and use 22 grams of coffee for 350 grams of water. If using volumetric scoops, ensure you’re using the same scoop every time and leveling it off rather than heaping. Most coffee scoops hold approximately 2 tablespoons or 10 grams of coffee when level.
Can I use regular coffee for pour over?
Yes, you can use regular supermarket coffee for pour over, though freshly ground specialty coffee produces significantly better results. Pre-ground coffee loses aromatic compounds rapidly and is typically ground for automatic drip machines, often too fine for optimal pour over extraction. If using regular coffee, choose medium or medium-coarse grind and use within one week of opening the package. Store in an airtight container away from light and heat. The pour over method’s precise temperature control and extraction timing will still produce better coffee than automatic machines, even with regular beans. For maximum quality improvement, buy affordable whole bean coffee from local roasters and grind fresh each morning.
How long should pour over coffee take?
Pour over coffee should take 3 to 3.5 minutes total brew time from first pour to final drip. This includes a 30-45 second bloom phase where you saturate the grounds and allow CO2 to escape, followed by 2-3 main pours over the next 2-2.5 minutes. If your brew finishes in under 2.5 minutes, grind finer to increase water resistance. If it exceeds 4 minutes, grind coarser to speed flow. The active pouring time is approximately 2.5 minutes, with the final 30-60 seconds allowing the water to drain completely through the coffee bed. Proper brew time ensures balanced extraction of desirable flavor compounds while minimizing bitter elements.
What temperature should water be for pour over coffee?
Water temperature for pour over coffee should be 195-205°F (90-96°C) for optimal extraction. Water below 195°F causes under-extraction, producing sour, weak coffee, while temperatures above 205°F risk over-extraction and excessive bitterness. Most electric kettles boil at 212°F, so let water rest for 30-45 seconds after boiling to reach the ideal range. Variable temperature kettles with precise controls eliminate guesswork and cost $60-120. Light roasts benefit from the higher end of this range (200-205°F) to fully extract their complex flavors, while dark roasts perform better at the lower end (195-200°F) to avoid emphasizing bitter compounds.
Do I need a gooseneck kettle for pour over coffee?
While not absolutely required, a gooseneck kettle dramatically improves pour over results by providing precise control over water flow rate and placement. The narrow, curved spout allows you to pour slowly and accurately in tight spirals, ensuring even saturation of all coffee grounds. Regular kettles with wide spouts pour too quickly and aggressively, creating channels in the coffee bed and uneven extraction. Gooseneck kettles range from $25 for basic stovetop models to $120 for electric variable-temperature versions. If using a regular kettle temporarily, pour into a small measuring cup first, then carefully transfer to the coffee grounds in a controlled manner, though this adds complexity and cooling time.
| Key Aspect | Recommended Specification | Impact on Coffee Quality |
|---|---|---|
| Coffee-to-Water Ratio | 1:16 (22g coffee to 350g water for 12oz) | Ensures balanced extraction and optimal strength |
| Water Temperature | 195-205°F (90-96°C) | Prevents under/over-extraction, balances flavors |
| Grind Size | Medium-coarse (sea salt texture) | Controls flow rate and extraction time |
| Total Brew Time | 3:00-3:30 minutes | Indicates proper grind size and technique |
| Bloom Duration | 30-45 seconds | Releases CO2 for even water saturation |
| Coffee Freshness | 2-4 weeks from roast date | Preserves aromatic compounds and complexity |